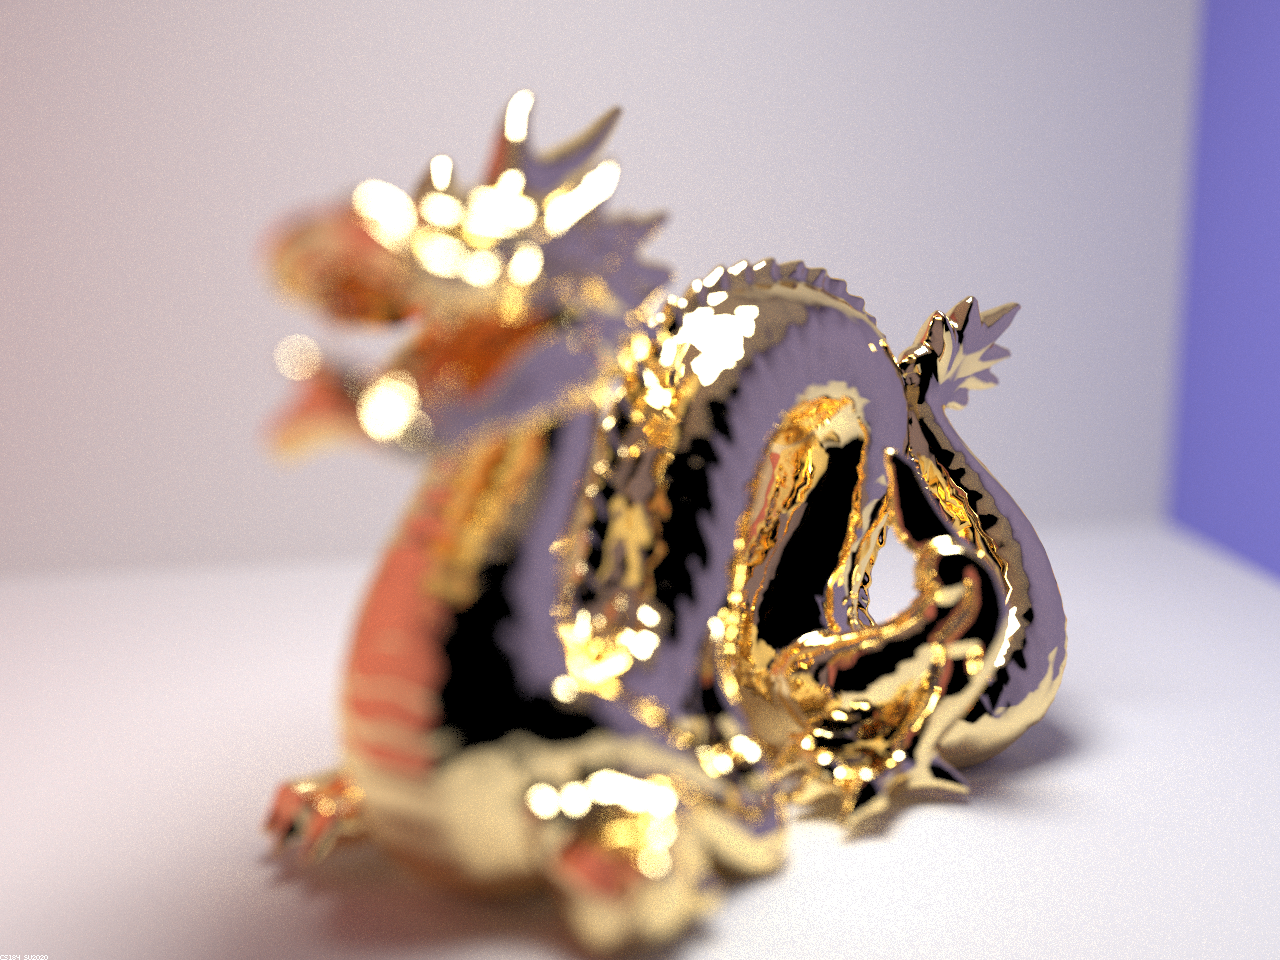
Part 1. Mirror and Glass Materials
|
|
|
|
|
|
|
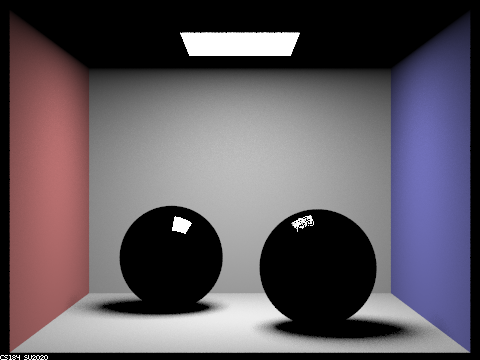
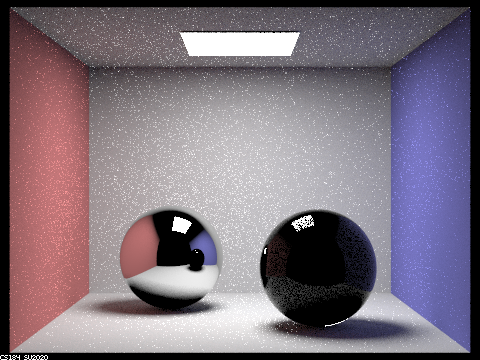
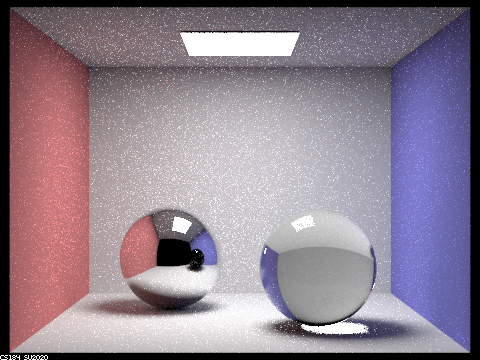
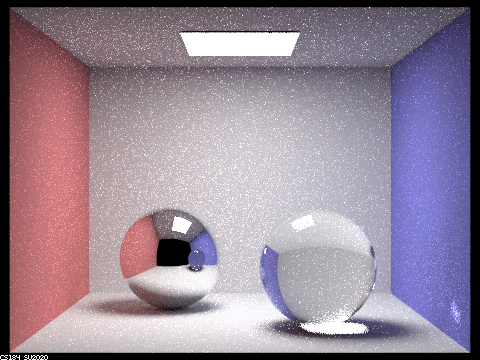
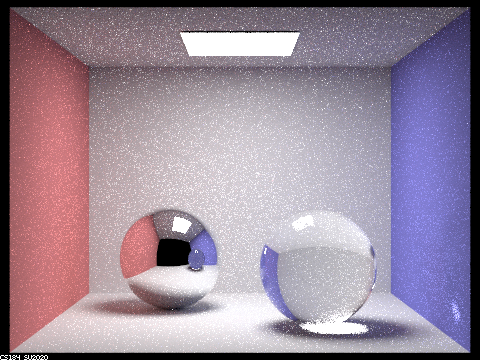
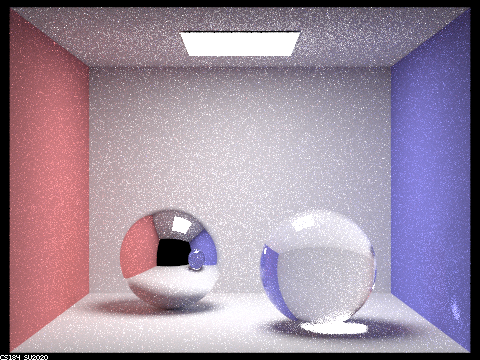
Starting with 0 max ray depth, we see that the image consists of only the zero bounce illumination. At 1 depth, the walls and floor are illuminated. The spheres are mostly black with the left sphere fully reflecting the rays from the light whereas the right sphere absorbs some of them due to being made of glass. At 2 depth, the box gets brighter and now light that bounces off the sides of the box can reflect off the left sphere and form an image that resembles that of the previous depth level. The right sphere is still mostly dark but you can make out the features and colors of the box. At 3 depth, the ceiling is illuminated on the left sphere and the right sphere now has visible reflections/refractions. It also has a "glare" on the floor from light refracting through the sphere and reflecting off the floor. The reflection of the right sphere on the left sphere shows the sphere as solid black. At 4 depth, the reflection of the right sphere on the left sphere is now colored and the right sphere now refracts some light onto the blue wall. At depths 5 and 100, the changes are hard to notice at this number of camera rays per pixel. It somewhat seems like the reflection of the right sphere in the left sphere gets slightyly shinier as the depth goes up.
These effects corresponding to these max ray depths make sense if you count the number of reflections/refractions. With 0, there are no reflections or refractions so the room is dark. At 1 depth, the colors of the walls are visible because rays can bounce off of them but the spheres are black since they can only reflect light that directly reflects from the light. Images of the room are visible at depth 2 because light bounces off the floor/walls, hits the spheres and reflects to the camera, though the right sphere is darker due to most the light being lost to refraction and not having enough remaining depth to exit the sphere. At 3 depth, light can now hit a wall, enter the right glass sphere, and exit the sphere towards the camera. The glare on the floor is from the rays entering the sphere, exiting the sphere, and then reflecting off the floor towards the camera. At 4 depth, the floor glare light rays can reflect towards the wall and then reflect off the wall towards the camera. Light rays can also reflect off the blue wall, enter the glass sphere, exit the glass sphere, and reflect off the left mirror sphere which allows the reflection of the glass sphere on the left mirror sphere to appear to have color. At even higher max ray depths, the light rays can bounce more times before entering the glass sphere, and exiting the sphere to bounce off the mirror sphere, which contributes towards the slight increase in shininess of the reflection of the glass sphere on the mirror sphere.
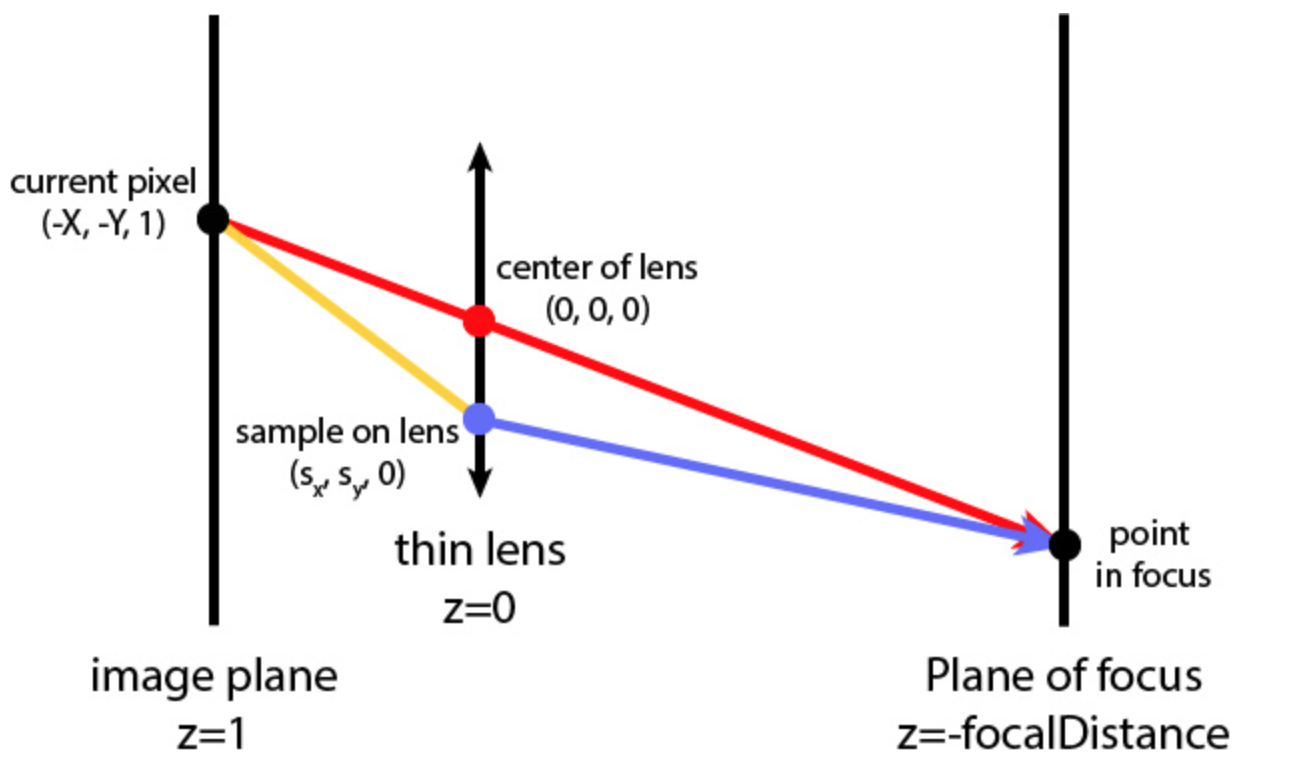
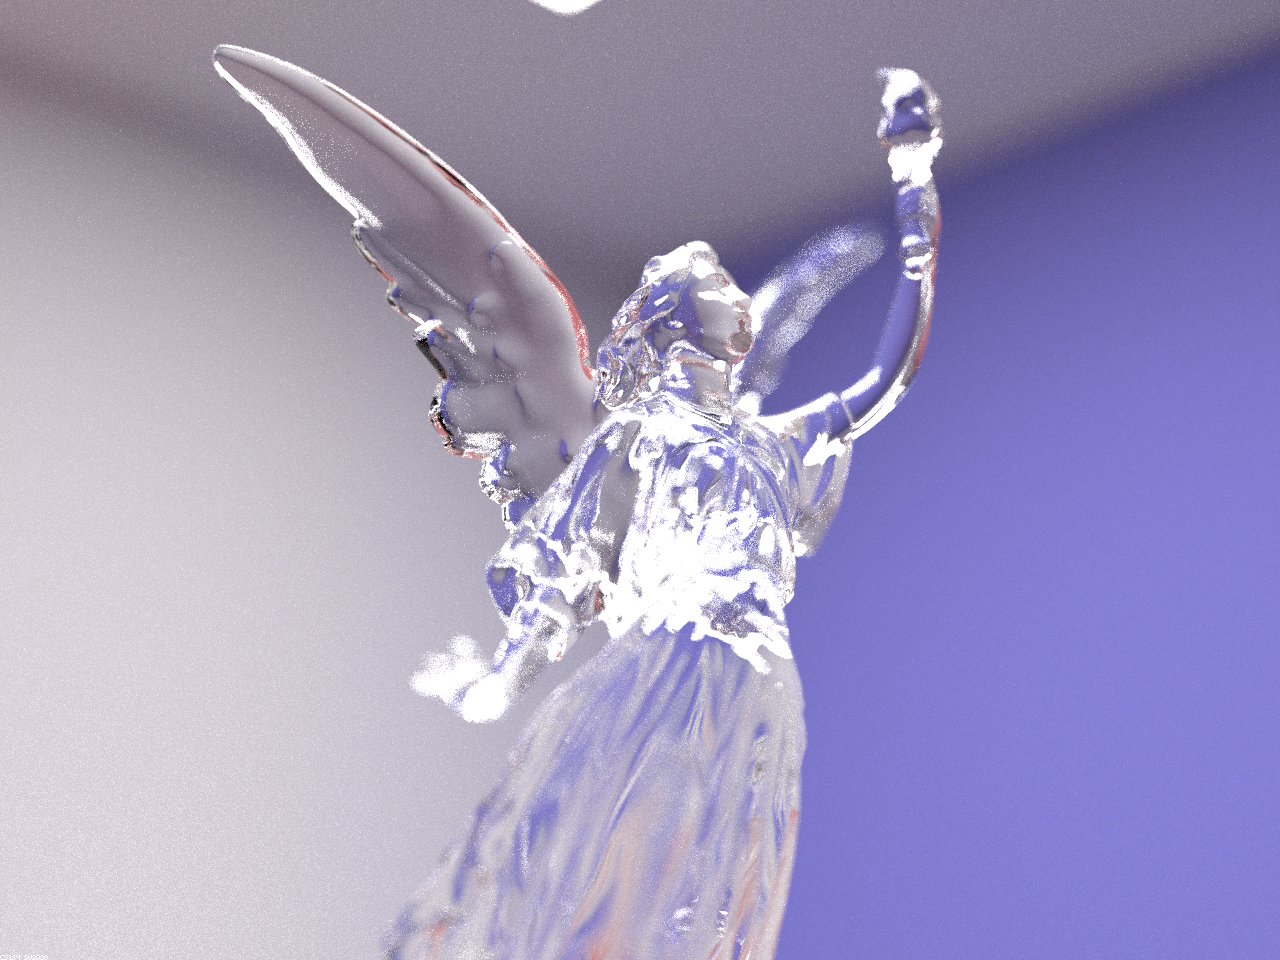
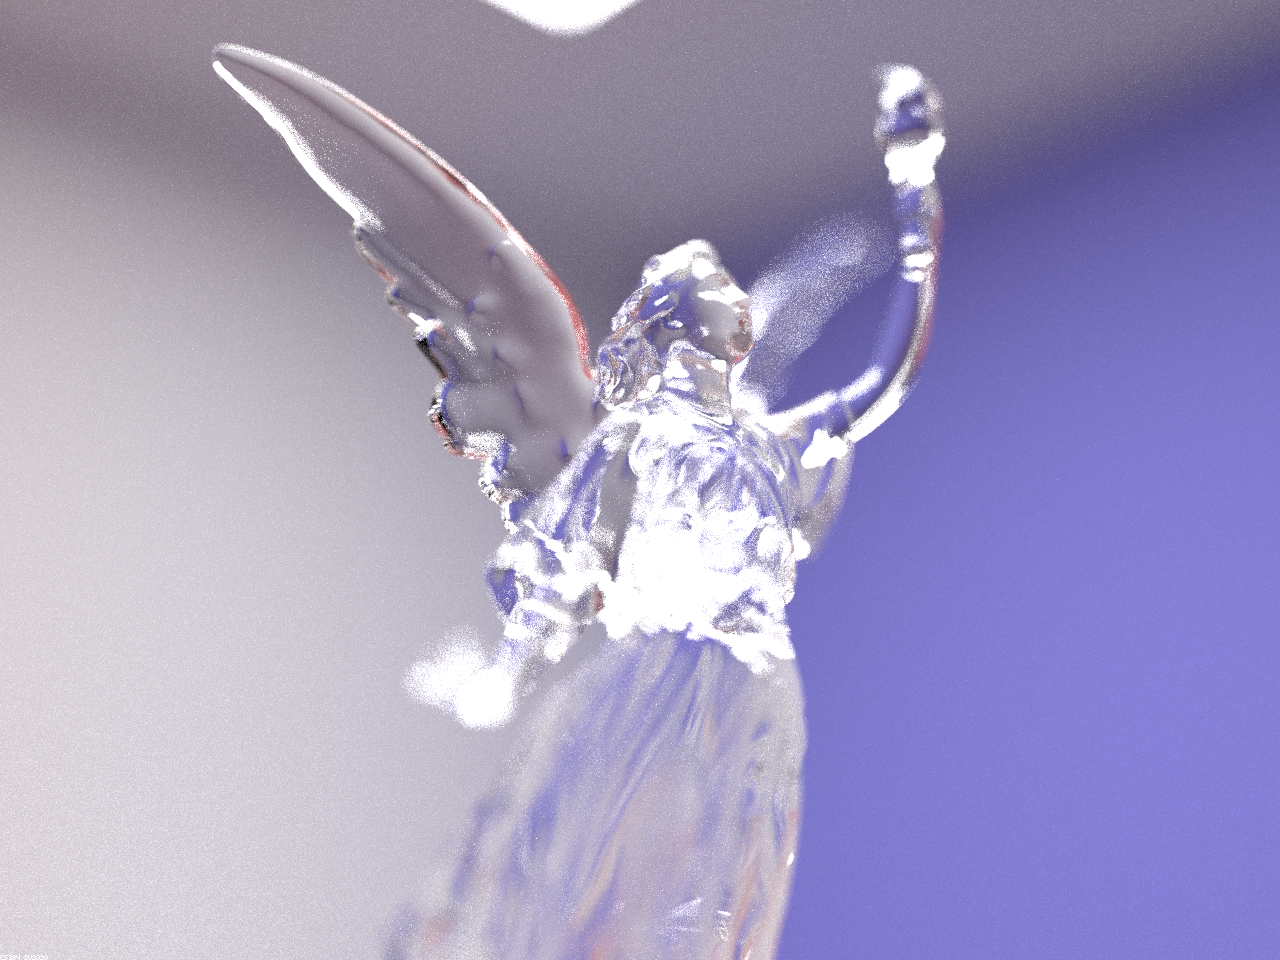
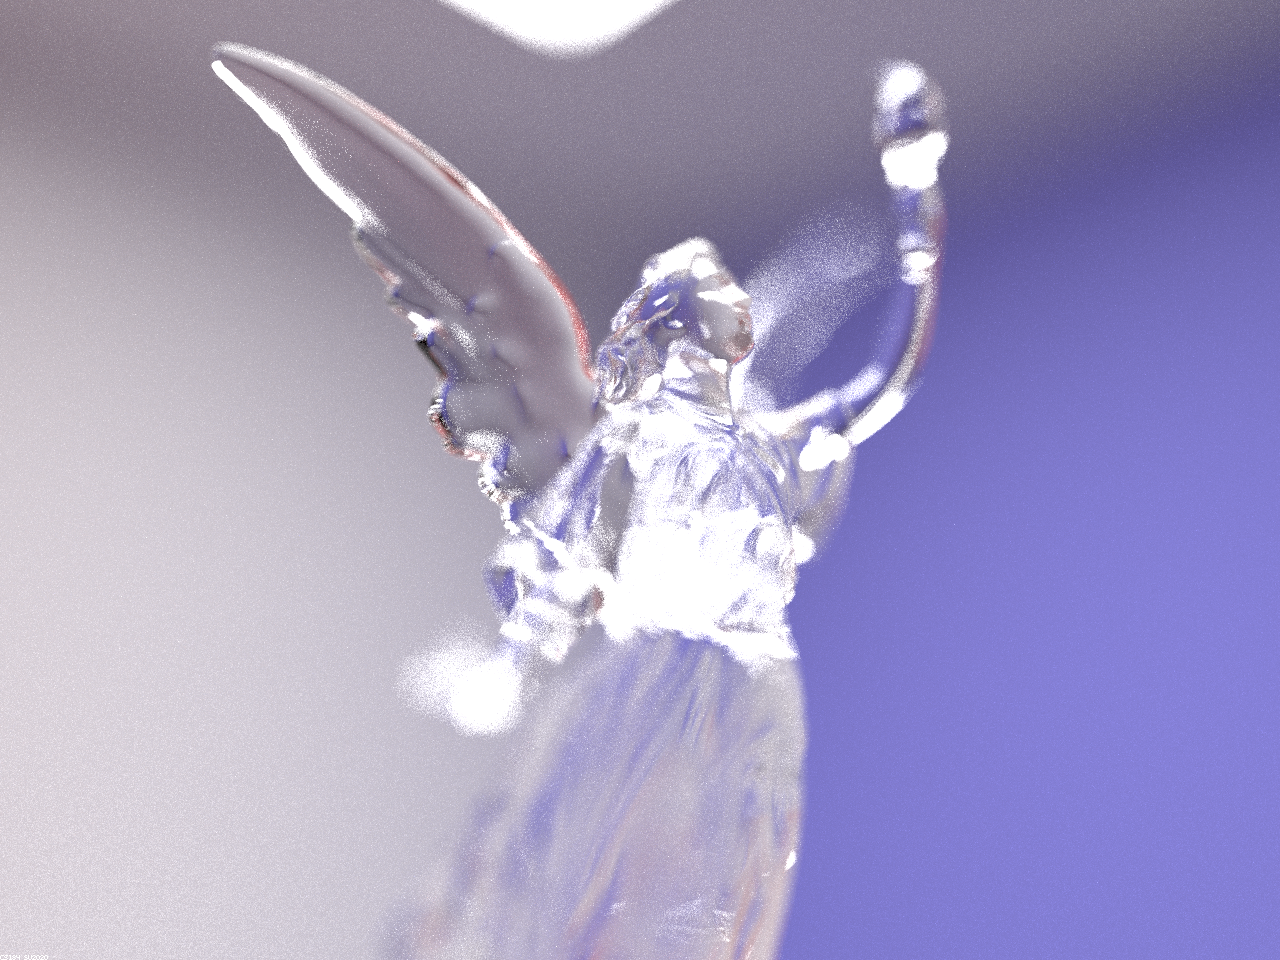
Part 4. Depth of Field
|
In our original implementation of the pathtracer renderer we used an ideal pinhole camera model, where all light rays contributing to
the radiance at the point
|
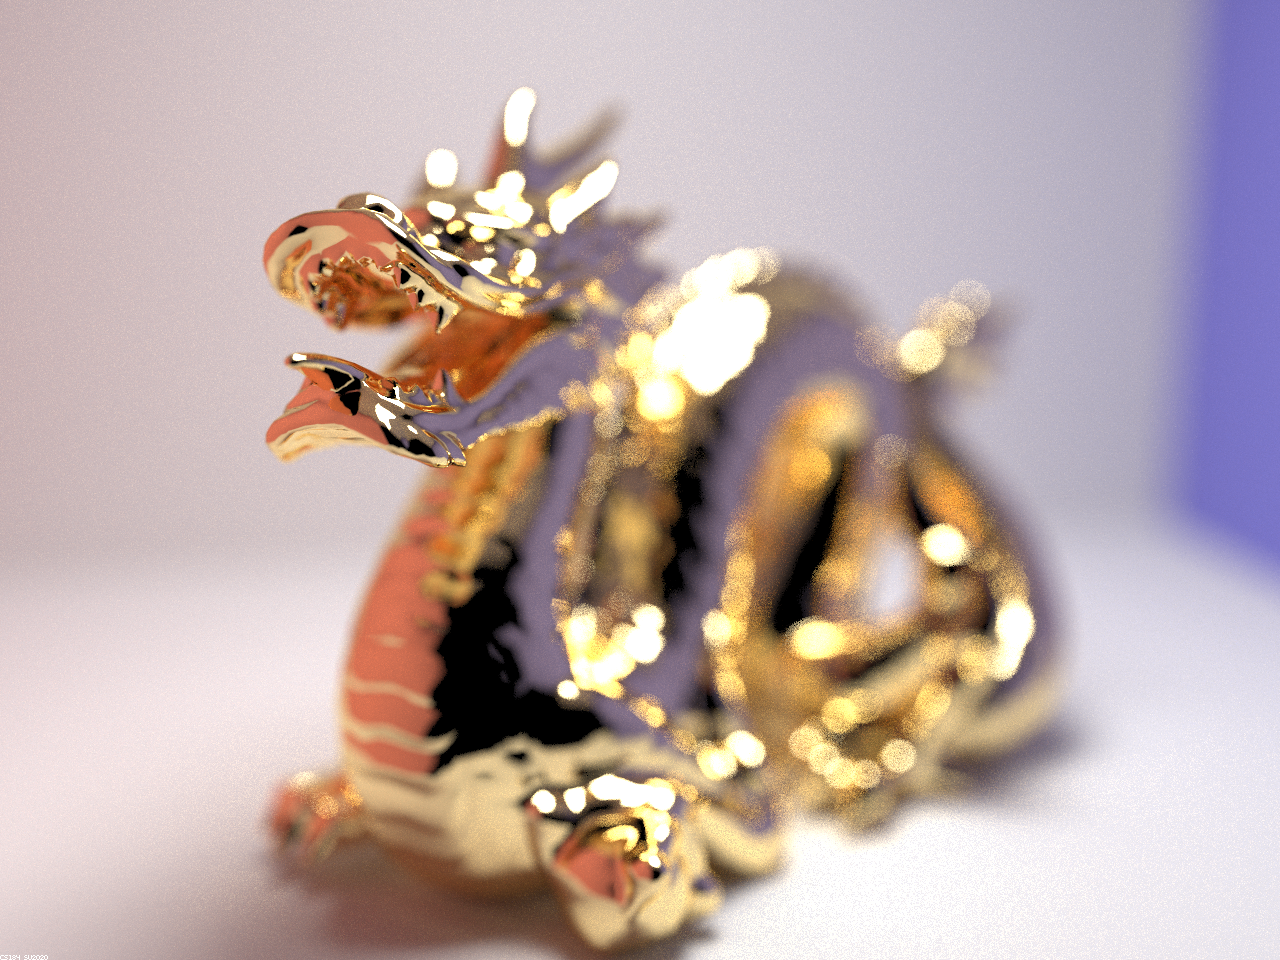
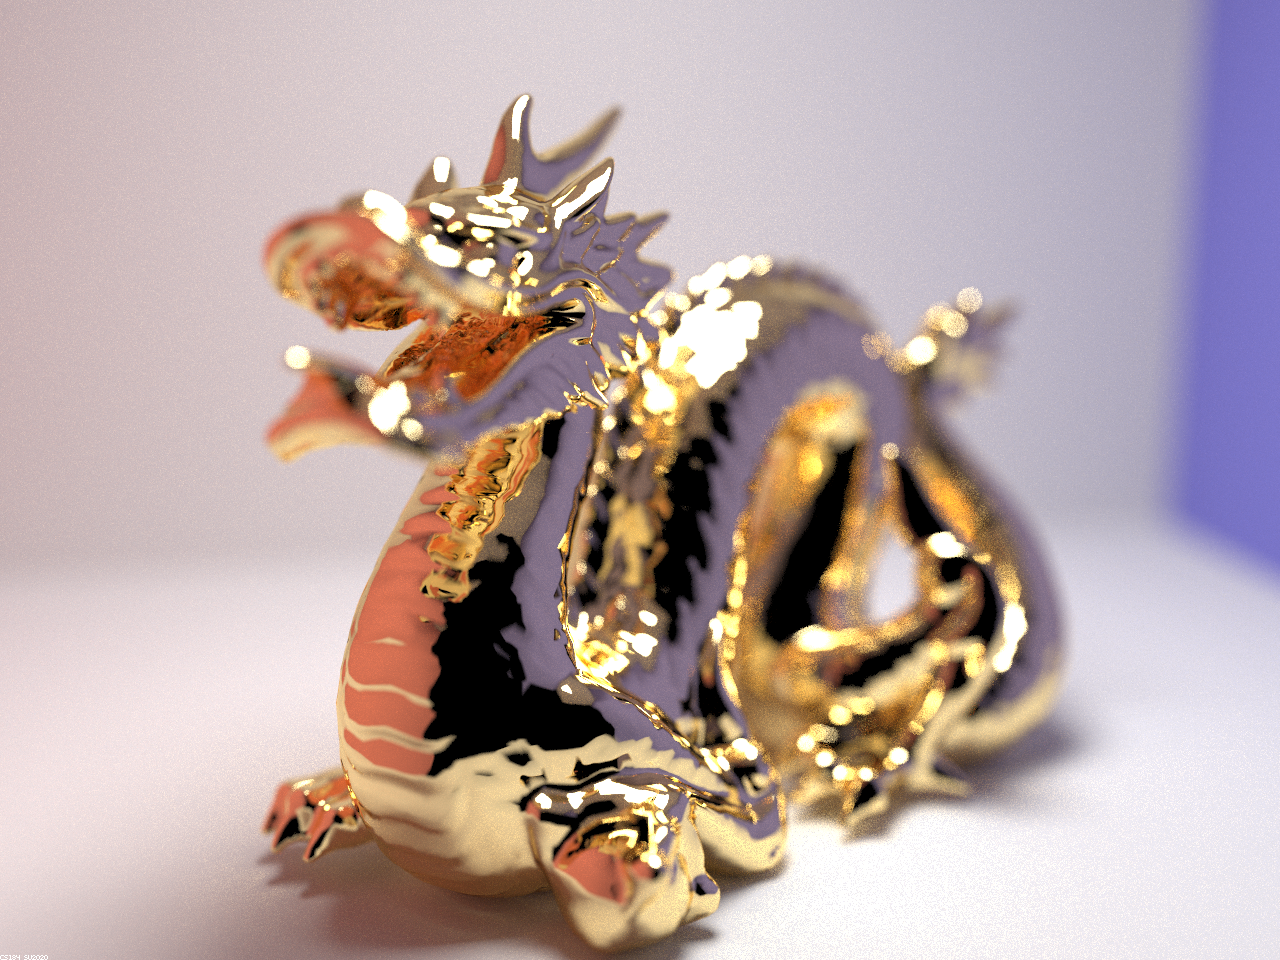
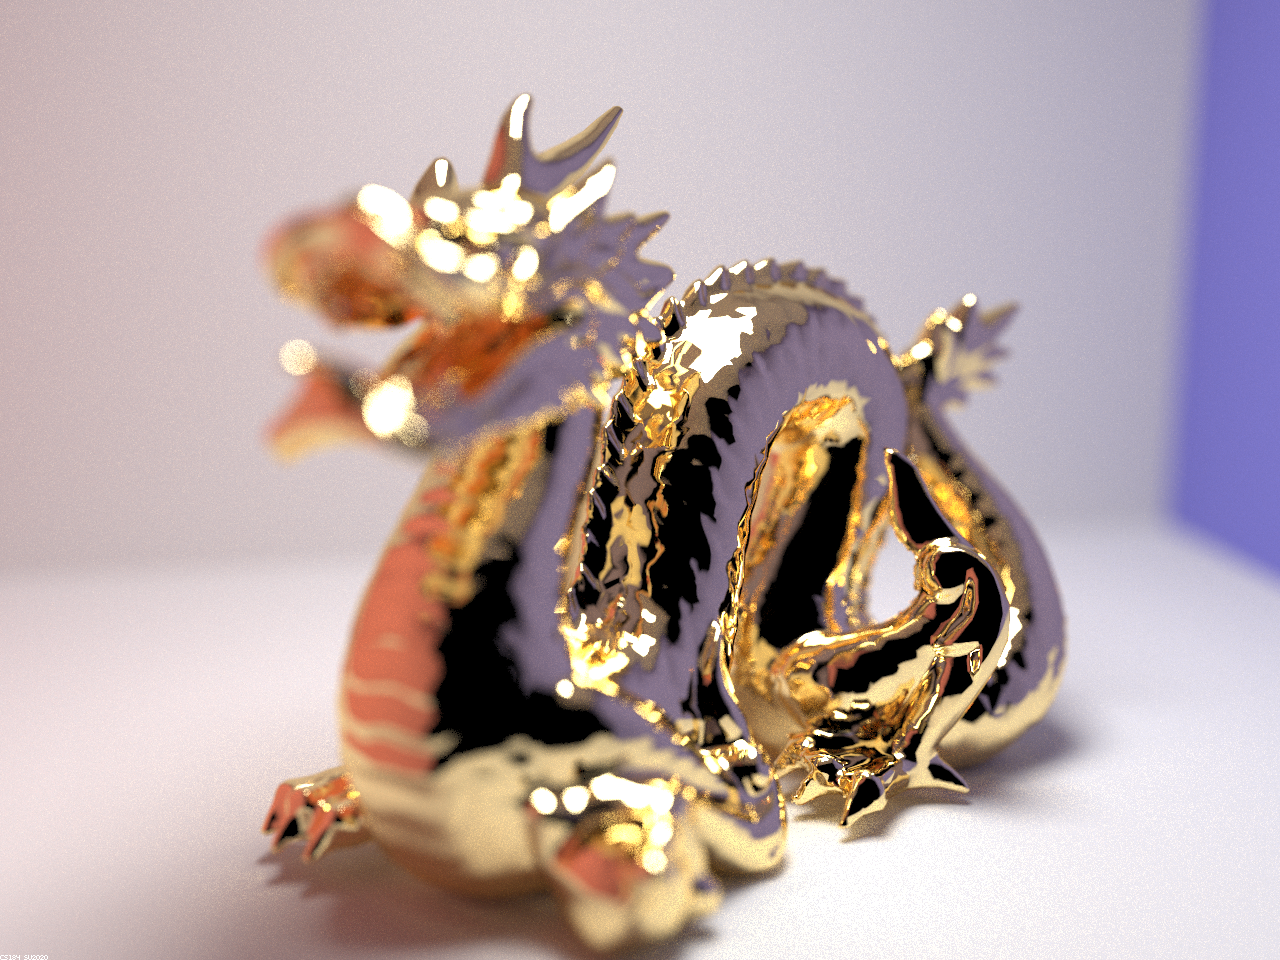
Below are four images of
|
|
|
|
Below are four images of

|
|
|
|